Wednesday, May 19, 2021

Nor Gloom of Night - Chapter 1

[EDIT 10/01/2022: There is now a fully revised version of this solo adventure available as a FREE PDF DOWNLOAD. Get it here on RPGGeek.com! The following is the rough and ready first draft exactly as it first appeared here on the Thaumaturgical Workshop. The revised version is better, and has pics.]

This week, free of charge, Part One of a (short) ready-to-play Solo Adventure for Talisman Adventures RPG! This will (hopefully) be a three part feature, and I will try and get the installments out as close to weekly as I can manage. I hope this will provide some interest and/or entertainment, especially for people who have just got their hands on the Talisman Adventures hardback and haven’t yet had a chance to actually play with anyone.

You will need a copy of the Talisman Adventures RPG rules to play. Page number references will be given to relevant rules sections during the adventure, though it will certainly help if you have at least a bit of an understanding of how the game works before you start playing. Skim the rules at least, then look up the relevant sections as you try and work out what to do!

It is also assumed that you have at least some familiarity with paragraph-based adventure games (in the manner of Fighting Fantasy gamebooks or Choose Your Own Adventure). If you don’t have any familiarity with paragraph-based adventure, I recommend checking out the links to (free!) Tunnels & Trolls solos in the side panel, particularly Dark Deeds & Cabbages.

The adventure is designed for a 1st level hero of any class or kindred (you could play one of the pre-generated characters from the core rulebook, or create your own), and is aimed at introducing some of the features of the game. You will be given the choice of paragraphs to read based on your decisions you make or the outcome of tests you roll. Full options have not been given for every spell or skill type - you may need to use your judgement to determine how a particular ability of your character applies in a given situation.

You start this adventure with 1 Light Fate. To keep things simple, you can play with an assumption that the GM is just hoarding their Dark Fate for retirement (i.e: just ignore Dark Fate), but if you wish and are prepared to make the effort, you can keep a track of the Virtual GM’s Fate and at your own discretion (based on what you think the GM would do)spend to trigger Enemy abilities, beef up Enemy Threat levels, or other uses (see Dark Fate, p.37).

Please feel free to ask questions, make suggestions or point out egregious errors in the Comments section below.

Now read paragraph #1!

#1

Two days ago you left the Hark to Bounder Inn, following the road north to Gladmeadow, bearing a small parcel addressed to Lady Gladden of Gladden Hall, entrusted to you by Magistrate Cannock. You are promised a modest reward for safe delivery of the package.

The road winds over a bleak desolate moor, dark clouds gather, and the wind rises. You pull your travel-worn cloak tight around your shoulders, determined to press on through these wild parts whatever the weather, as there is little in the way of shelter hereabouts and you have many miles yet to go before you reach Gladmeadow.

To see how well your hero manages to make their way over Dule Moor, you will first need to make a Guide Test. The difficulty of the test is 14, and the relevant skills are Lore (Wits) or Survival (Insight). Before you roll, check if your hero has a relevant ability or follower that might allow you to modify the result in some way. See p. 213 for more information about Exploration and the Guide Test.

If you Fail, read #2. If you achieve a Standard Success, read #3. If you achieve a Great Success, read #4. For an Extraordinary Success, read #5.

#2

You press onward through a raging storm. The road soon becomes a muddy torrent, and somewhere along the way you stray from it, and stagger through the bog in a thick fog, unsure whether you are even going up or downhill. You are hopelessly lost. You curse your misfortune, and feel ready to fling the package down the hillside... (Or perhaps you are tempted to break Magistrate Cannock's trust and open the package? If so, Read #13. If not, Read On:)

The mists are beginning to clear, but you cannot help but reflect that now you are better able to see, you are also better able to be seen... 

Soaked to the skin, your character will suffer a -1 penalty to any tests/skill checks rolled until they have managed to get a good night’s sleep. Now read #6

#3

You press on towards Gladmeadow, but as the weather begins to turn foul, you are forced to take shelter from the worst of the downfall in a small grove of trees.

You have managed to find your way in the correct direction at least, but as the outcome of a Standard Success is often mixed, may suffer some negative consequence. As you are travelling alone, there was no-one to take the role of Watcher during your Exploration (see p.214), so you risk being ambushed by an Enemy. Roll 1d6. On a roll of 1-4 Read #4; on a roll of 5 or 6 Read #6   

#4 

You make good progress over the moor on the road to Gladmeadow. The clouds have cleared, and though the day is drawing to a close, the sky has brightened now the storms have passed, and you hope to put a few miles behind you before sunset. You are thinking about finding a good spot to make camp for the night, when something catches your eye. To the right of the road a track leads to a small copse of trees, and a thin plume of smoke rises from behind the trees. Perhaps there is a crofter’s hut hidden there, or some traveller’s encampment?

Will you investigate the plume of smoke? Read #7

Or do you prefer to avoid the risk of encountering bandits or hungry ogres, and instead find a secluded spot to encamp by yourself? Read #10

#5

Approaching you on the road ahead, you see an old woman leading a mule that is laden with all kinds of bundles, packs and tools. The old woman walks with a bow-legged gait, and puffs away on a thin clay pipe. She does not appear to pay you much regard as your paths meet, instead pressing slowly on muttering to herself (or her mule).

Perhaps you would like to try to strike up a conversation with this aged and possibly distracted traveller? If not, you may continue on your way (Read #4). If you wish to speak to the old woman, you will find her to be crotchety and uncongenial. In response to your approach, you must now determine her Attitude (ranging from Hated to Devoted and every stage in between - see p.152). She is Human, and (belying her temper) of Good alignment. Roll 3d6 and consult the Attitude Chart on p.152. After determining attitude, you may try a Persuasion (Insight) Test at Difficulty 16 to improve her Attitude (see p.154).

If the final result is Hated, read #14. If Disliked, Suspicious or Neutral, she will simply have no time for you, and you must be on your way, read #4. If Favourable or Liked, read #16. If Devoted, read #20.

#6

The distant howl of a wolf sends a shiver down your spine. To your alarm, it is answered by another cry much closer at hand. You barely have time to reach for a weapon when a dark, ferocious shape emerges from the fog and leaps at your throat!

Your character has been attacked by a wolf! Grab your dice, and refresh yourself on the combat rules (p.37-48). Read through the notes below, decide your actions, and resolve the combat.

Firstly, you will need to determine if the wolf’s attack surprises your character. Make a Notice (Wits) Test at Difficulty 14 (see Exploration Surprise p. 39) Failure or success will determine if your character is surprised (and can only take a Defence action against the enemy's attack in the first round of combat), or whether they will be able to make an attack (possibly with a penalty applied). 

The Wolf has 13 Threat, 12 Life and 3 Armour; its bite inflicts 1d6+3 damage (for further details of this Enemy, see p.183).

If your hero is taking any action that doesn't target the Wolf (or wolves if more appear, see below), then remember they will also need to Defend against the wolf's attack that turn.  

Having resolved the first round of combat, you should then continue to chose actions for your hero, and resolve appropriately. The Wolf will continue to fight until it is slain or otherwise defeated. If you wish to flee from the wolf at the beginning of any combat round after the fist, Read #8. 

Note - the wolf special ability (summon Wolf Pack) that can be triggered by the GM spending 1 Dark Fate. For this adventure, such Enemy abilities will only occur if you roll a 1 on the Kismet die while making a test during combat with that enemy.

If the wolf's Summon Wolf Pack ability is triggered, it will only summon 1 wolf at a time (rather than 1d6) - to a maximum of 3 additional wolves.

If your character is a spell caster, you will need to use your judgement to determine the effects of the spell. Successfully casting a spell such as Barrier or Gust of Wind ought (in addition to any damage inflicted) give your hero the opportunity to escape unhindered (Read #9). 

If your character is a Minstrel, you may be able to Charm the wolf (see p. 173 for details of the wolf as a Follower).

Similarly, if your character has the Animal Handling skill, they might try to pacify the wolf. Make an Animal Handling test against the Wolf's threat of 13, but with a -4 penalty to the result, as the wolf's bloodlust is up.  A Standard Success will mean that the wolf is confused and doesn't attack this round: proceed to the next, trying again if you wish. a Great Success will be sufficient to pacify the wolf and allow you to escape unhindered and an Extraordinary Success not only pacifies the beast but allows you to also acquire the wolf as a Follower (see p.173).

If you can think of any suitably clever option not listed here, honestly determine the difficulty of the appropriate test (see p.35) and brag about your cleverness in the Comments section below.

If you survive the encounter with the wolf (making a note on your character sheet of any injuries sustained or wolf Follower acquired), Read #9. 

If your character is reduced to unconsciousness, ravenous wolves feast on their remains, and their brief saga ends here. Not generally needing to bother with rolling for Death Tests (p.47) is one of the bonus features of solo adventuring...

#7

Instinct warns you to approach the copse of trees cautiously…

Make a Stealth Test (Agility) at Difficulty 14. Remember to apply any modifiers for special abilities or skill focuses, and remember that if you don’t have the Stealth skill, you will just be making an unmodified 3d6 roll.

If you Fail, read #15. If you achieve a Standard Success or better, read #11.

#8

In fear of your life, and in sheer desperation, you turn and flee…

If your character is a Priest, some sense of sanctity prevents the beast from pursuing you; if a Sprite you may simply fly out of harm’s way; in either case read #9. Otherwise, you must first make a Defense Test against the wolf’s Threat of 13, with a -2 applied to your roll owing to your craven flight. Failure will result in you taking 1d6 +3 damage; a standard success will result in half damage; great success no damage; an extraordinary success no damage and the wolf, snapping at your heels, breaks a tooth on a rock and flees with a yowlp of pain (read #9).

If you are not a Priest or Sprite or rolled less than an extraordinary success, you will still need to escape the wolf. If you try and outrun the creature, read #12. If you realise the folly of either choice and prefer to fight the creature, return to #6 and continue to resolve the remainder of the combat.

#9

For surviving the encounter with the Wolf, your character earns 1xp. You are fortunate to avoid any further vulpine encounters that day, but find your nerves on edge listening and looking out for fresh danger. You dare not rest until you have put many miles behind you, and evening finds you looking for somewhere to make camp out on the desolate moor. Read #10.

#10

You look for a suitable location to camp for the night - some dry hollow or curled by the roots of a stunted tree.

To determine your success, you will need to make a Survival (Insight) Test at Difficulty 12. The outcome of the test will determine whether you will pass the night safely, or whether there will be an encounter during the night - see Camping, p.214. If you fail the test, read #18.

If you a standard success or greater, you pass a restful night in deep sleep, and you will be able to recover life points, spell points, and in the morning have time to refit (but not repair) armour (Read #21).

#11

Stealthily approaching the source of the smoke, you spy three ugly little creatures with long noses, pointed ears, and dressed in green, roasting a rabbit over a campfire. One is holding a silver brooch, which the other two eye enviously, and boasts: “That dull-witted oaf didn’t even realise that I lifted it!”

Suddenly, all three look towards you with intense, scowling stares. Whether they heard or merely sensed you, you do not know, but a moment there is a squawk of alarm, and then the figures are gone. You might almost wonder if they were ever there, except that there is a campfire still burning…. If your character is a sprite, leywalker or elf, read #19. Otherwise, will you back away from this place, and find somewhere safe and secluded to camp for the night? (Read #10).

Or will you investigate the campfire? (Read #15).

#12

You simply cannot outrun a wolf on the open moor, and I don’t care what you roll. Return to #8, and make another defence test against a fresh attack.

#13

You take the package that Magistrate Cannock entrusted to you. It is small, not much larger than your hand, bound in hide, and closed with a ribbon and a wax seal. The package is quite light, though something shifts when you rattle it. If you are determined to break the seal and the Magistrate’s trust, read #17. If you think better of it, put the package away, and continue on the road to Gladmeadow, return to paragraph #2 and continue with your journey.

#14

The old woman fixes you with a gaze of singular malevolence, and makes the gesture of the Evil Eye. You sense a doom-laden curse falling upon you, and are so taken aback that she and her mule are gone before you can react.

The effect of the curse is such that the next three occasions that you roll a 6 on the Kismet die, you must reroll that die and accept the second result (though if you roll a 6 again it will use up another ‘charge’ of the curse, and you must roll again). Now continue on your way and read #4.

#15

In the midst of the copse of trees burns you find campfire, and a rabbit on a makeshift wooden spit, which looks and smells cooked to perfection. The warmth of the fire and the savoury aroma of roasted rabbit are extremely enticing after your long, wet journey. If you settle down by the fire to eat and rest, read #18. If you instead hurry away from this place and the temptations it offers, read #10.

#16

The old woman, though curmudgeonly, seems to take a liking to you. From what you can gather from her rather rambling conversation, she is some kind of geologist or prospector, out looking for obscure rocks and stones of academic rather than material value. Before you each continue on your way, she gives you a piece of iron ore, and advises you to keep it with you in these parts, especially while you sleep. With no further explanation, she chuckles and bids you farewell. Somewhat puzzled by the encounter, you continue on your way (Read #4).

#17

Inside the package is a folded letter, and a pebble with a glowing rune inscribed on it. The letter reads: Alas, if you are reading these words, it seems that I have made a grievous error of judgement! Please find yourself employment elsewhere. The Blasting Stone will destruct in approximately five seconds after you have finished reading this. C.

You note that the rune on the pebble is increasing in brightness… With a cry of alarm you hurl it from you, just before it explodes, knocking you off your feet, but luckily causing no further harm. Having failed in the task entrusted to you, and failed even to profit from breaking that trust, you had better retire from this adventure and seek your fortunes elsewhere. Take 1xp for the lesson you have learned (whatever that may be exactly). The End.

#18

Utterly exhausted, your sleep is deep and undisturbed. You awaken fully rested (restore all Life and Spell Points). If you are bearing a piece of Iron Ore, read #20. Otherwise, as you are gathering your things together, you discover to your alarm that the package entrusted to you by Magistrate Cannock is gone, as is all of your gold. Disaster! Having failed in the responsibility entrusted to you, it seems that you will have to seek your fortunes elsewhere. Take 1xp for the lesson you have learned (whatever that may be exactly). The End.

#19

You are certain that the creatures you saw were of the Dark Fae, most probably Boggarts. Wicked beings, they are known to be mischievous thieves, forever scheming to deprive honest folk of their wealth and goods. If you wish to investigate their campfire, read #15. If you prefer to find somewhere away from here to make camp for the night, read #10.

#20

Perhaps you remind her of a favourite grandchild or long lost pet, but for whatever reason, the old Prospector has taken quite a shine to you. She warns you that there are Dark Fae lurking in these parts, but that a piece of Iron Ore (which she hands to you) should ward off the wicked creatures. Make a note of the Iron Ore on your character sheet. She also gives you a Garnet Stone, remarking that it particularly took her eye, but that she has no need of for it, and insisting you keep it to remember her by (Though should you ever sell it, it is worth 10 gold). She also gives you directions to help you find your way to Gladmeadow (Allowing you to add +2 to any Guide Test made between here and your destination. She pinches your cheek, and bids you a fond farewell. Gain 1 xp, and read #4.

#21 

The morning sun shines clear and bright, birds sing, a pair of young rabbits hop around playfully in the morning light. The road ahead begins a long, gentle descent to Gladmeadow, and you are filled with confidence and optimism that you will soon have delivered your package and earned a reward. One of the rabbits hops right in front of your path - and then a dark-feathered hawk swoops down and snatches it away in an instant. A cloud moves across the sun, and the landscape darkens and grows chill. You hasten your stride, and cast your eyes about furtively, wondering what perils might lie in wait ahead…

Congratulations, you have successfully completed the first chapter of this adventure. Your character earns a further 1xp for managing to get the package this far. Be sure to return next week for Chapter 2 

Continue your adventures here in Chapter 2!


Friday, May 14, 2021

Special Delivery

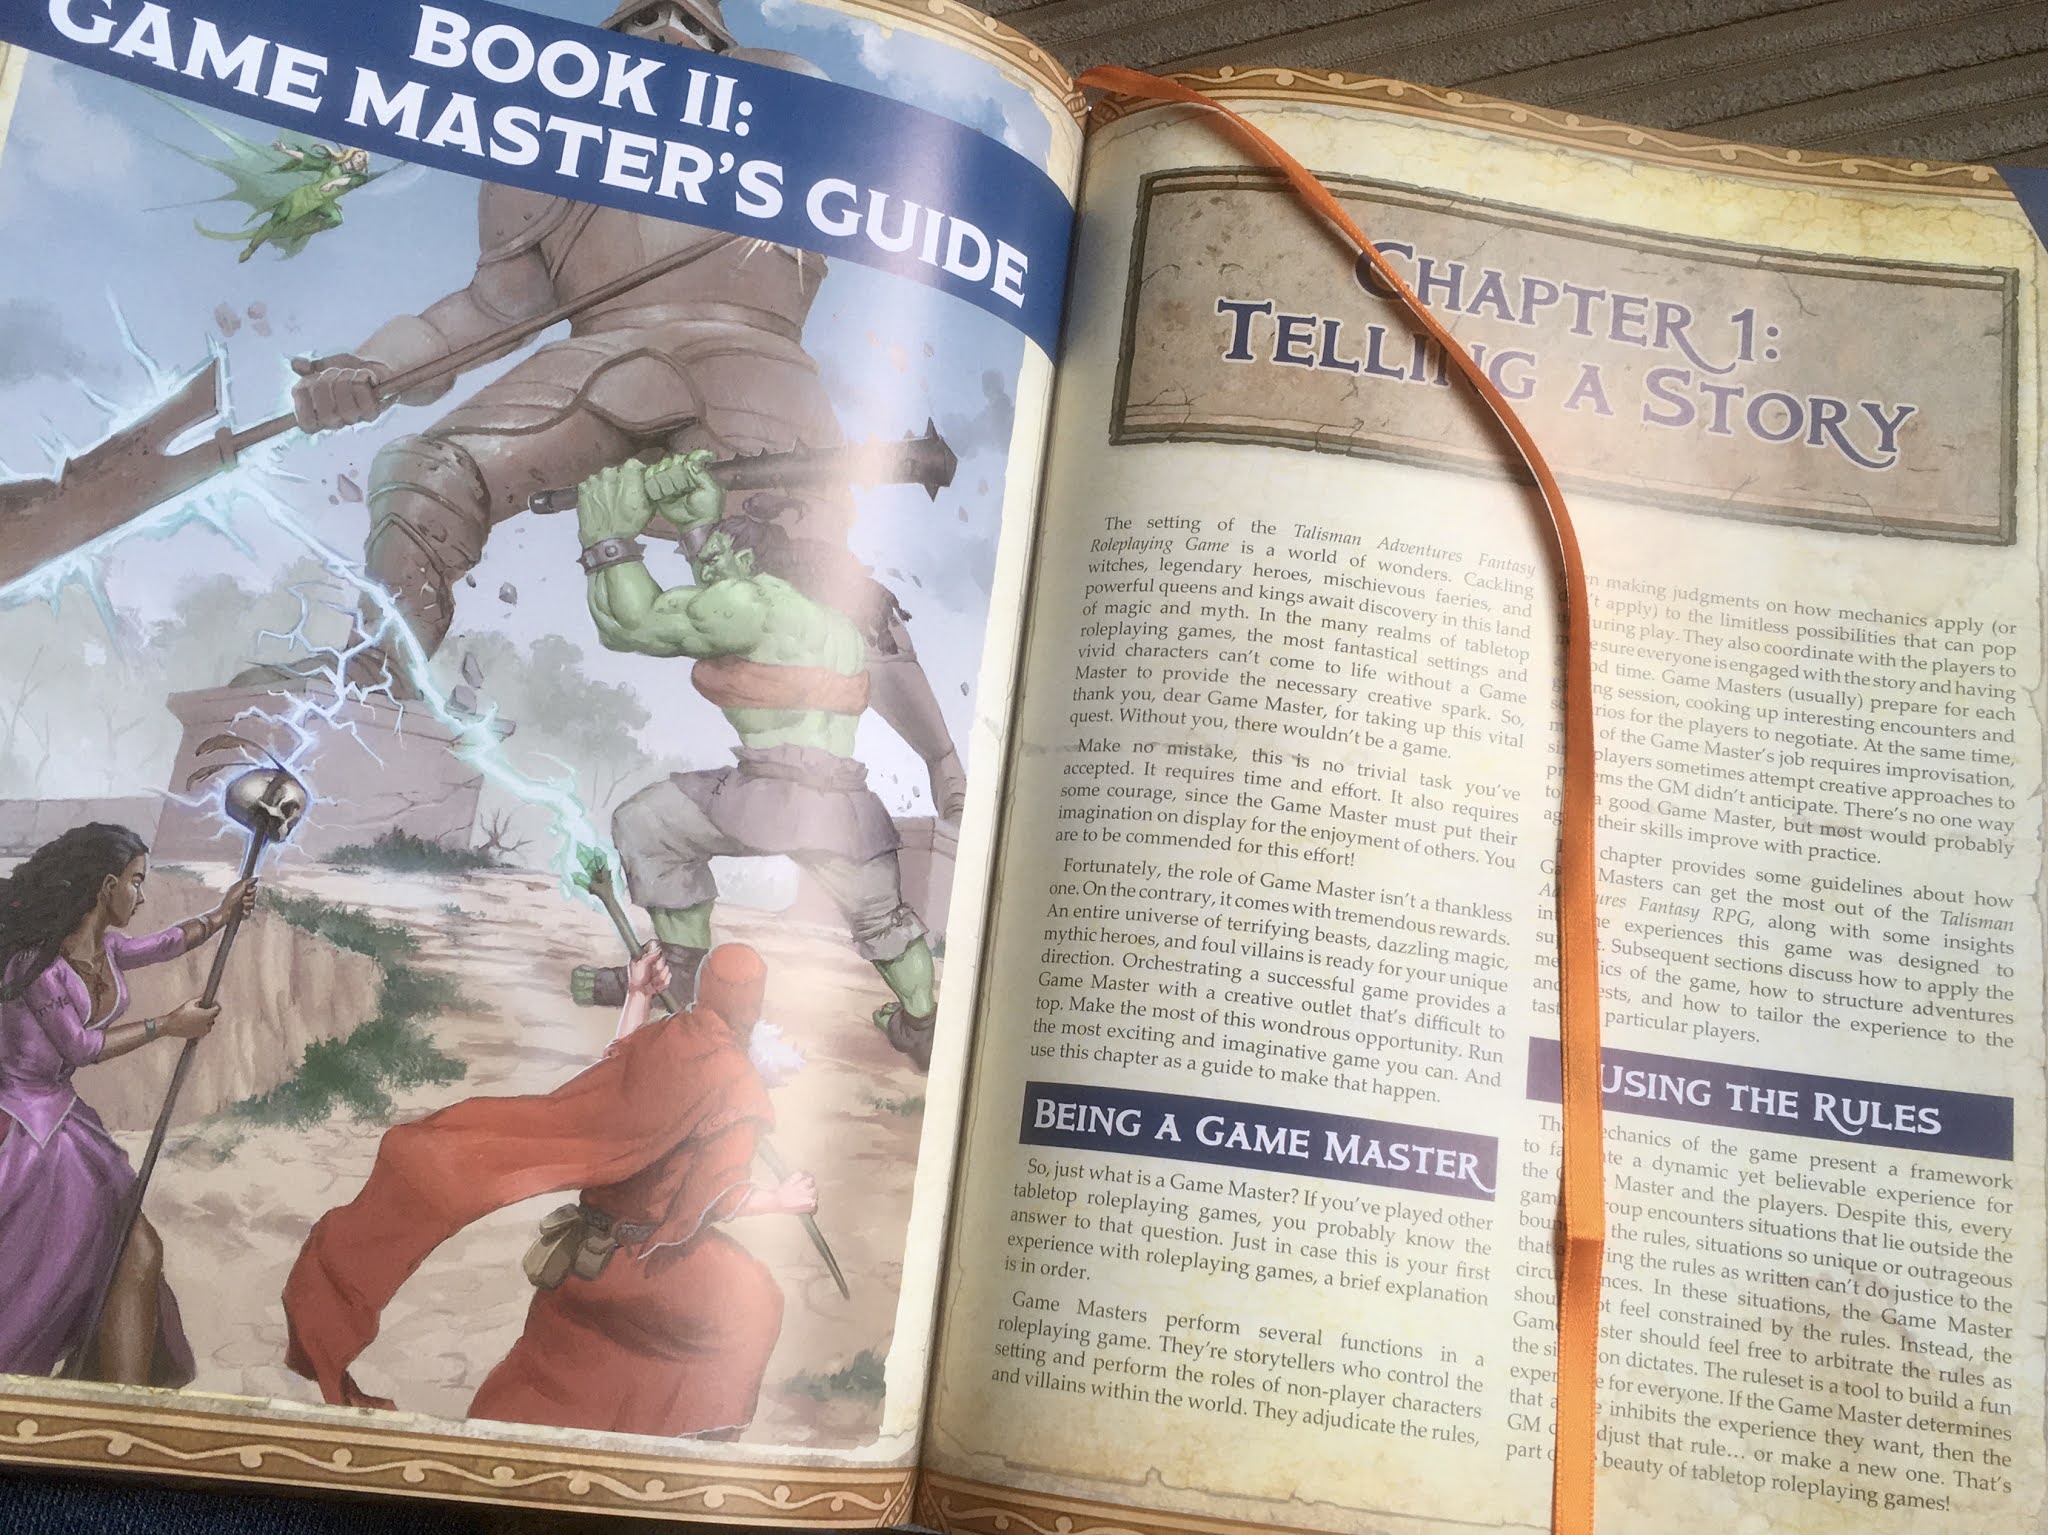
No excuse making for this week's late posting, but here are some pictures of what the postperson brought today. Delighted of course to finally be getting my hands on a physical copy of this game. What's more, I hope to be able to make opportunities to play actual in-person face-to-face real world sessions of this game available at a (fingers crossed) national gaming event. More news as I get it! Next week (probably) Part One of a free-no-strings-attached solo adventure you can play with your physical copy (or pdf for that matter) of Talisman Adventures RPG. Gadzooks!  


Tuesday, May 4, 2021

Cartomania


The Talisman Adventures RPG comes with a nice fold-out map of The Realm of Talisman - neatly derived from the layout of the board itself, putting the familiar locations from the board game into a more geographical relationship with each other. There is some good guidance for the GM about using this map - being flexible about distances and encouraging the GM to feel free to  add more locations as they please.

In my campaign I've run with this, and have at length provided players with the above zoom of the South Western  portion of the map. The heroes started out playing through "The Corpse Watchers" - an adventure which starts at the village of Haven on the edge of the Whispering Wood. Whispering Wood is shown on the official map, but not Haven, so I've thrown it in. For an idea of scale, it takes the heroes about 3 day to penetrate the depths of the forest to a barrow mound.

I then had my merry band make their way to Gladmeadow Fayre, and the locations thereabouts feature from the events they stumbled into. 

Jabbersnatch Gulley is the home of relatively benign Goblin Cabbage Farmers - it also happens to exist in an alternate Tunnels & Trolls universe  where I set the mini solo adventure Dark Deeds and Cabbages. If you visit, be sure to name-drop Grand Cabbage-Wallah Hurvle Tranglewhang.

Gladden Hall is the ancestral home of Lord Gladden of Gladmeadow - a stout, fortified manse, known to hold "The Luck of the Gladdens" - a crystal bowl, gift of the Fae, which guarantees the fortunes of the family and their lands. (Inspiration drawn from a legendary piece of glassware, The Luck of Edenhall, one of a number of such found in this part of England, and deeply connected to local faery lore).

The Fae Witch's Grave is an addition to the campaign map resulting from a combination of the hasty head-lopping of Gark the Troll Warrior, the pragmatic piety of Jewel the Ghoul Assassin, and the post-mortem ministrations of Perron the Dwarf Priest.

Thripsey Dingle is a Faery Glade, whose name may be hauntingly familiar to readers of Jack Vance's Lyonesse. Events in the campaign have revolved around mysterious machinations of Dark Fae. The heroes have started to get some answers by visiting, though it appears that the fairies have stolen a year from them (whether as a fee, a caprice, or entirely without regard is not yet known).

The Hark to Bounder is a country inn (by coincidence greatly resembling The Hark to Bounty in the Forest of Bowland). Magistrate Cannock settles dispenses justice and (somewhat arbitrarily) settles disputes there, holding court over cold fowl and a jug of dark ale.

Greyhaunt Cemetery might be the grave yard from the opening of a modified version of "Death's Messenger" which I have dropped plenty of plot hooks into, in anticipation of the heroes someday finishing with the current faery shenanigans. If so, one might imagine that the Enchantress makes her home somewhere on the south-eastern edge of Fallen Giant Wood... But campaigns have a habit of moving in new and unanticipated directions, so whether this is where things end up remains yet to be seen.

Monday, April 26, 2021

Breaking News! Talisman RPG is hitting the streets!

The eagerly awaited actual print copies of Talisman Adventures RPG have finally arrived with publisher Pegasus Spiele, and should be winging their way to buyers and suppliers. Designer Ian Lemke has shared these pictures of his copies of the standard and limited editions. There had been some speculation about the difference between editions - it seems the limited has a plush faux-leather cover and metallic corner-protectors. Also, glad to see confirmed that the world map and the cardboard Fate tokens come separate from the books.

Pegasus have also updated their free handout download on Drivethru RPG, which now includes an all-new Character Creation Supplement. The supplement provides for random details for Ancestry and Class (including height and weight, both omitted from the core rules, but Frequently Requested). Now you can find that your Sprite is 80cm tall, weighs 15kg, is 223 years old, cherishes a Badly Carved Tusk and believes that "Truth told does pain unfold". Neat!

Toads & Diamonds is also included, an entertaining romp for 2nd - 3rd level characters, now updated for the current iteration of the rules. Still does not contain a map for the caves - an admittedly entirely unnecessary extra feature I may needlessly remedy in the near future (for much as I applaud playing without maps, they are fun to draw).

Monday, April 19, 2021

Do not trust the Wee Faeries

At the GAMA trade show, Tim Huckelbery teased the news that there are a number of sourcebooks in the works for Talisman RPG, and expected to follow the publication of the game some time this year. "Tales of the City" and "Tales of the Dungeon" were mentioned. The sourcebooks will have more material about running adventures in those settings, more character classes and kindreds, and a GM adventure in the setting. It seems reasonable to speculate that these sourcebooks are following the structure of the game's "corner board" expansions - leading me to also be keen to some material from the "small box" expansions get into print (Harbinger campaign book plz?)

There are a lot of reasons why it makes sense for the RPG to follow the pattern set out by the board game - doing service to the popular elements of the board game setting, using a ready-made structure for releases that will make sense to (hungry hungry) consumers, and making use of the work that has gone before on the setting.

My connection to the Talisman  board game has largely been a nostalgic one to the early days of the game, but exploring the RPG has also made me pay a bit more attention to the material that was developed by Fantasy Flight for the 4th Edition.

The campaign I am currently running for the RPG has been using a lot of the Faery elements of the setting, gradually emerging in the story as part of the conflict between Titania and Oberon, Queen and King of the Faeries. They are probably most familiar to the general public as characters in Shakespeare's Midsummer Night's Dream, but were introduced (as far as I am aware) into the world of Talisman in FFG's Woodland's expansion to the game. Woodlands included a whole slew of elements from the lore and legends of faeries, including a lot of the darker elements and creatures in Irish and British mythology. These have been carried over and worked into the background of Talisman RPG.

For the GM of Talisman RPG, this is particularly useful. It means that you can go to the boardgame to look for further ideas (concerning which more in upcoming posts!), and also gives a pointer to elements of mythology to look into for inspiration. In my own game I was particularly drawn to including Fomorians, Sluaghs, and dark and mysterious Sidhe, from avid childhood reading of the Slaine the Barbarian in 2000ad, and also playful but sinister pixies and fairies drawn stolen wholesale from Jack Vance's Lyonesse - both of which works were based on roots in Irish mythology. 

I cannot pretend to know enough about the source material to point in the best direction to go on this, but a quick search on Gutenberg throws up Irish Fairy Tales by James Stephens, which needs no better recommendation than the illustrations by the incomparable Arthur Rackham., and the delightful Fairy and Folk Tales of the Irish Peasantry by William Butler Yeats - if you only read the opening of "The Trooping Fairies" you will be richer for it:

"Do not think the fairies are always little. Everything is capricious about them, even their size. They seem to take what size or shape pleases them. Their chief occupations are feasting, fighting, and making love, and playing the most beautiful music. They have only one industrious person amongst them, the lepra-caun—the shoemaker. Perhaps they wear their shoes out with dancing. Near the village of Ballisodare is a little woman who lived amongst them seven years. When she came home she had no toes—she had danced them off."

I can add one fragment of faery lore from my own experience - well, second hand experience. I recall hearing an elderly gentleman on a radio phone-in in Ireland. Asked by the host "And do you believe in the Good Folk yourself?" he replied: "No, but I wouldn't trust the wee feckers either."

Monday, April 12, 2021

Lost Without A Map?

 Last week I suggested the classic fantasy novel The Princess and the Goblin as prime material for a Talisman GM to work up into an adventure for players. The story has a clear, clean setting (making it easy to adapt into an RPG adventure), and interesting little tweaks on familiar fairy tale tropes (which suit it well to  the world of Talisman). There's much more worth saying on this subject.

Talisman Adventures RPG has a game system which lends itself to the kind of adventure-writing proposed here. Firstly, we have the Test system used for resolving challenges, which among other merits, encourages the players to take a lead in developing the story. Secondly, Monster & Stranger descriptions and abilities which are "ready to play" straight from the GM guide. So potentially, the right setting, with a cast of characters and their sets of individual goals, might be all a GM needs (Disclaimer: Individual GM & player styles and abilities will vary, adapt this advice to your own experience, and proceed with caution! Or just go for it). There is a significant third element found in Talisman Adventures, which should, I hope, become clear.

Let's take a closer look at the setting for The Princess and the Goblin, as summarised last week: We have a) the Castle, which is on the side of b) a Mountain, on which there is c) a Village and beneath which there are d) Goblin Caves (and e) Mines dug by the Villagers). There is something very striking about the (so far) published adventures for Talisman Adventures (The Corpse Watchers, Death's Messenger, and Toads & Diamonds). In all three adventures, there are no maps. OK, there are actually two floorplans of locations in Death's Messenger, but there are no maps showing the relation of one location to another - not even in Toads & Diamonds which has a dungeon. I have no idea if this was intended, or if the result of practical considerations related to publication, but (being someone who is very drawn to maps) it caused me t give serious consideration to the benefits of playing without maps showing rigidly defined locations - and of this being accepted and understood by all at the table. 

Talisman Adventures RPG has an Exploration feature (using the ubiquitous Test mechanism), which makes more sense if the game has no maps (or only maps which are loose in what they define). Part of the procedure is this - when players are travelling, they are assigned roles. One is The Guide - they make a Guide Check against a certain difficulty (modified by factors such as difficulty of terrain, certain skills or followers, or indeed whether the characters own a map), and the Failure, Standard Success, Great Success and Extraordinary Success outcomes could determine how long it takes to reach the destination, whether players get lost, or whether they encounter a baneful or beneficent location. 

As players get more familiar with this system, they may get more inventive in making suggestions for outcomes, and the GM's guide has dozens of ready-to-use locations and obstacles. These are largely drawn from card encounters in the board game, and indeed having them occur in an unexpected, or indeed unlikely or improbable fashion should appeal to players and GMs who enjoy that feature of the board game.

In the GM's guide, the Exploration feature is applied to a fairly typical wilderness situation. In Toads & Diamonds, the dungeon (though not mapped) is physically described (ie which chamber leads to which). But the same Exploration rules  could be applied to dungeon exploration in pretty much the same manner as to overground adventures. This may fly against usual dungeoneering instincts - surely you gotta have a map for a dungeon?

In The Princess and the Goblin, the princess in question wanders in forgotten corridors and floors of her father's Castle at the beginning of the story, until eventually she finds herself at the mysterious chamber of her even more mysterious grand mother (a very intriguing Fairy Godmother type). She is later only able to retrace her steps to that chamber when the story demands it  sorry, when The Time Is Right. In game terms the chamber can be found on the roll of a Great (or perhaps only Extraordinary) Success. No map is required, only a general description of the location (up a hidden high tower, at the end of long corridors and stairs that cross and intersect confusingly). The suite of the Fairy Grandmother is the only significant location in the Castle in the story, but the GM could easily throw in a trap chamber, or encounters with guards/servants/ghosts to allow for other Exploration outcomes.

The same can be applied on a larger scale to the Goblin Caves, and dungeons in general. The GM can describe Levels of a dungeon which represent how deep into the cave system the heroes have gotten, and have locations listed for the different outcome types. Think of this in relation to the different locations in the Mines of Moria in Lord of the Rings, exploration of which would be much better-suited to a game system that uses abstractions rather than a physical map. 

So, as an example, for the Goblin Caves in The Princess and the Goblin, below is a table of locations/encounters, categorized by Guide Test outcome results. There could be multiple possible outcomes for each result type to allow variety for continued play, or to give the GM a range of choices depending on player tastes/session tempo, etc - here I am just giving one example for each (which could be enough for play, if the GM is confident). Those familiar with the actual rules of Talisman Adventures RPG will be aware that for now I have ignored the other principal character role in Exploration, The Watcher. This is largely for the sake of simplicity - I'll go more in depth into different roles in (dungeon) exploration in coming weeks.


Failure

Standard Success

Great Success

Extraordinary Success

Entrance to caves

Goblin guard cave - must encounter goblins!

Can avoid guards, continue searching

Can proceed to Cave mid-levels

Find secret route to Deeps

Cave mid-levels

Trap Cave! Use one in GM's guide, or invent

Goblin guards

Can proceed to Cave Deeps

Find a Lost Treasure (GM's guide or invent)

Cave Deeps

Monster Cave! Weird goblin creatures, or eg a Manticore

Main (guarded) entrance to The Hall of the Goblin Palace

Secret entrance to The Hall of the Goblin Palace

Secret entrance to Goblin Prisons 

More Next Week!

Footnote: In case you missed it above or otherwise in the news media, can I just say 1991 Russian TV Adaptation of Lord of the Rings, and dare the curious to take a look.

Further Footnote: This Saturday 17th & Sunday 18th April is Spirit Games' 2nd "Digital Beer & Pretzels" online gaming convention. I am running two sessions of "Bring Me the Egg of Perlew Crag" (working title!), an introductory scenario designed to throw new players straight into the action of Talisman Adventures RPG. If you are interested in joining in, please head on over to Spirit Games website and sign up! You also might want to check out some of the friendly & fun board gaming on offer over the weekend.


Sunday, April 4, 2021

The Princess and the Goblin

 "The Princess and the Goblin" by George MacDonald is often regarded as the first fantasy novel. It was an acknowledged influence on both C S Lewis and J R R Tolkien, and generally speaking, there is something about the way it takes familiar old fairy tale tropes (Princess, Fairy Godmother, Goblins, Castle, Working Class Hero) mixes them up, and tells a gripping tale with some unexpected turns and developments. Furthermore, as it was first published in 1872, it is firmly in the public domain and free to download at Project Gutenberg. 

I blithely claimed in my first post post that Talisman owes more to "Jack Vance and the Brothers Grimm than to Tolkien". This may not be strictly true. However, in addition to reflecting my own feelling for the particular atmosphere of the game's world, it might also serve as a good rule of thumb for how to look for inspiration for fantasy RPG adventure: look a little bit further than the Lord of the Rings and you may find rich pickings.

For a GM looking to write an adventure, there are lots of great ideas to steal from "The Princess and the Goblin". Let's take the setting, which is a compact, self-contained little world: we have a castle, by a mountain, a village of miners live on the mountain, and caves full of goblins live under it. The King is absent, the Goblin King resents him, and there is a plan afoot for the goblins to tunnel into the castle and kidnap the Princess . The goblin forces are bolstered by  bunch of goblin animals - ordinary above-ground animals that from life below have twisted into all sorts of ghastly shapes. The Goblin Queen has fearsome Granite Boots (to hide her deformed feet and to instill obedience).

All excellent starting points for an aspiring GM's adventure-writing. We can change things round (they plan to kidnap the Prince; the Absent King is wicked and perhaps stole something of value that the poor goblins want or need back; the miners resent the King and they plan to undermine the Caste and blame it on the Goblins...), or just steal a single element (Granite Boots of course, or maybe a spider-legged goblin pig). 

*** 

I like to go to Project Gutenberg for literary inspiration - yes, because it is all free and legitimately sourced, but also because there is some some damn good stuff there. Lord Dunsany (The King of Elfland's Daughter and Don Rodriguez: Chronicles of Shadow Valley are there, but not alas the Charwoman's Shadow) and everything by L Frank Baum for starters (most scenarios will benefit from flying monkeys, or a glass cat perpetually seeking compliments on its pretty pink brains). 

There are also many collections of folk tales that I will have to post about separately sometime, though if I may draw attention to two contrasting favourites - the entirely over-written but charming Traditions of Lancashire collected by John Roby, (amongst much else there is an extended dialogue with His Satanic Majesty (so named) in The Dule Upo' Dun) and the elegantly concise Korean Folk Tales of Pang Im and Yuk Yi.

Granite Boots of Shin-Kicking: Enemies: On a roll of 1 on the Kismet die, a hero or Follower takes an additional 1d6 damage. The GM may spend 1 Dark Fate to increase the Threat of any adjacent Goblinoids by +2. Heroes: These boots allow the wearer to spend 1 Light Fate to inflict an additional 1d6 of damage in a melee combat.They also allow a reroll for all Intimidation checks, with +2 on Intimidation checks against Goblinoids.

Airecon 2023 Session Report Compendium

Session 1: The Marauders of Wheppersnade Cove (1st iteration) This was my opening session at Airecon, and the only game that hadn't sol...